Showing posts with label yummy. Show all posts

Monday, January 28, 2013

Chocolate Cake for Two


Happy Nom Nom Monday!  I've been on a chocolate kick lately.  I just can't get enough of it.  Most days I don't think about chocolate at all.  Then like clockwork four o'clock rolls around, and I'm salivating for a candy bar, or ice cream with any kind of chocolate chunkiness.  Sure a melty chocolate cake would be delish, but bake a whole cake for one? or two?  Not gunna happen.  Though, as you know I've recently discovered mug cakes that you can cook in the microwave or oven, and they are an amazing solution. Today I made a melty Chocolate Cake For Two.  


Ingredients:
- 4 tablespoons of butter
- 4 ounces of bittersweet chocolate (I had to substitute with baker's unsweetened chocolate & 3 TBSP of sugar)
- 1 egg
- 1 egg yolk
- 2 tablespoons of sugar
- 1 teaspoon of flour
- powdered sugar for garnish

Directions:
Preheat the oven to 450ºF.  Butter an oven proof dish that can hold one cup, and coat the dish with sugar.  In a double boiler melt the butter and chocolate together, stirring regularly.  

In a medium sized bowl whisk together the egg, yolk, and sugar.  Once those ingredients are thoroughly combined add the chocolate mixture while whisking.  Add the flour, and continue stirring until the mixture is smooth.  Then pour into the small buttered dish.  Place in the oven for 15 - 20 minutes.  Remove and turn upside down on a plate to cool.  

Let cool for a few minutes, then gently tap the sides, and lift the dish releasing the cake onto the plate.  If it doesn't come loose, you can flip it upside down and using a butter knife gently separate the cake from the edges of the dish.  Then turn it upside down again, and hopefully it will drop out.  Garnish with powdered sugar, and enjoy with a close friend or lover!    


This dessert is extra decadent.  Part of me wanted to gobble the whole thing down, but my thighs reminded me I should share.  I love warm melty desserts, but I need to remember moderation is the key.  With these cold days and onslaught of holiday gorging, I mean festivities, my pants have become uncomfortably tight.  Time for me to eat more greens, and exercise more!  On that note, Happy Nom Nom Monday, chris!

Monday, December 24, 2012

Cookies, Cookies, and more Cookies!


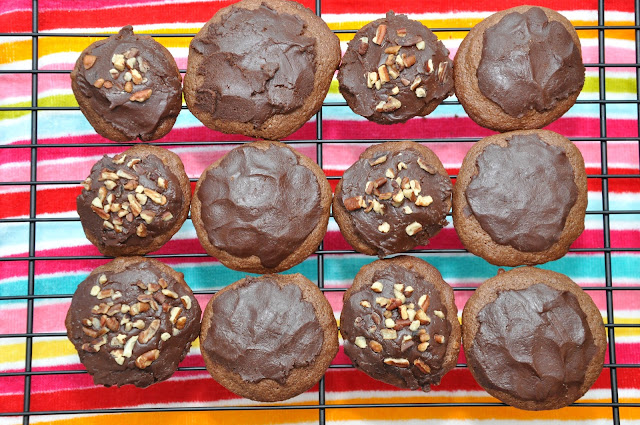
Happy Nom Nom Monday, and Christmas Eve! I know what a lot of people will be cooking tonight, COOKIES!!!  To save money this year my brothers and I are exchanging cookie instead of presents.  I love trying new recipes, and today I'm going to share the three cookies I baked for our cookie exchange.  

Chocolate Drop Cookies:
Dough--
-  1 cup of granulated sugar
-  1/2 cup of butter (softened)
-  1/3 cup of buttermilk
-  1 teaspoon of vanilla extract
-  1 egg
-  2 ounces of unsweetened baker's chocolate
- 1 3/4 cup all-purpose flour
-  1/2 teaspoon salt
-  1/2 teaspoon baking soda
-  1/2 cup pecan pieces
Frosting--
-  2 ounces unsweetened baker's chocolate
-  2 tablespoons butter
-  2 cups powdered sugar
-  3 tablespoons hot coffee
-  1/2 cup of pecan pieces (for garnish)

Directions:
Preheat the oven to 400ºF, and grease a cookie sheet.  Using a double boiler melt the baker's chocolate.  Once fully melted let cool to room temperature.  In an electric mixer, beat together the sugar, butter, buttermilk, vanilla extract, egg, and melted chocolate.  After those ingredients have fully combined, add in the flour, salt, and baking soda.  This should make about 36 cookies.  I know not everyone is a big fan of nuts, so I baked half the cookies at this stage, and mixed in the nuts to the leftover dough, and finished baking the rest of the cookies.  The cookies should bake for about 8 to 10 minutes.  

After the cookies have cooled make the icing.  Melt the chocolate and butter together in the double boiler.  Then stir in the powdered sugar and hot coffee.  Spread the icing on the cookies, and for the nut cookies top with the pecan pieces.  


Pignoli (Pine Nut) Cookies:
-  2 cups almond paste (16 ounces)
-  1 1/4 cup granulated sugar
-  1 cup powdered sugar
-  1/2 teaspoon salt
-  2 large egg whites
-  2 tablespoons of honey
- 1 cup all-purpose flour
-  1 1/4 cups pine nuts

Directions:
Preheat the oven to 325ºF, and line the cookie sheets with parchment paper.  This is a recipe that really needs parchment paper.  Normally I try to skip this step to be more green, but I had to adjust the recipe to make it work without parchment paper.  Another problem I had with this recipe is that the almond paste only came in 7 oz. packages, and I didn't want to buy three packages only to use two ounces out of the third one.  If I didn't have enough things working against me I also added an extra egg white for some odd reason.  This resulted in the dough being beyond sticky, so I wasn't able to roll it into balls.  To fix this problem I left the dough in the fridge overnight, and then in the morning I added about a cup of flour by 1/4 cup increments.  

To prepare this dough mix together the almond paste, both sugars, salt, egg whites, and honey.  If the dough isn't to sticky at this point, and you would be able to roll it into 1.5 inch balls go for it.  However if it is too sticky, or if you accidentally added an extra egg white, or if the cookies are sticking to the pan after baking then add in the flour.  Once the dough reaches the desired consistency, it is ready to be rolled into 36 balls, and before being placed on the cookie sheet they can be rolled in the pine nuts.  Then bake for 15 to 18 minutes.  I also didn't buy enough pine nuts, so I used those sparingly, and had to substitute with toffee bits on a few of the cookies.  


Peanut Butter Pillows:
Chocolate Dough:
- 1/2 cup canola oil
- 1 cup sugar
- 1/4 cup maple syrup
-  3 tablespoons of milk
 - 1/2 teaspoon vanilla extract
- 1 1/2 cup all-purpose flour
- 1/3 cup unsweetened cocoa powder
- 2 tablespoons black unsweetened cocoa powder
-1/2 teaspoon baking soda
- 1/4 teaspoon salt

Peanut Butter Dough:
- 3/4 cup peanut butter (creamy or crunchy)
- 2/3 cup powdered sugar
- 2 tablespoons milk
- 1/4 teaspoon vanilla extract

Directions:
In an electric mixer combine the oil, sugar, maple syrup, milk and vanilla extract.  Slowly add in the flour, cocoa powder, baking soda, and salt.  Once that is completely mixed together, stick in the fridge while mixing the other dough.  

Mix the peanut butter, powdered sugar, milk, and vanilla together.  Preheat the oven to 350ºF, and grease the cookie sheets.  Then form the peanut butter dough into 24 balls.  Next, remove the chocolate dough from the fridge, and form into a flat disc.  Then place a peanut butter ball in the center, wrap the chocolate dough around the peanut butter ball, and then roll into a ball.  Place about two inches apart on the cookie sheets.  

Bake for about ten minutes.  Let cool for about five minutes before transferring to a wire rack to complete cooling.  


I'm amazed by how easy these were to make.  I was certain they would be the hardest.  That's why I left them for last, but now I'm considering making another batch!  I made an extra cookie (or two) to taste, and they are killer.  The original recipe from Post Punk Kitchen is vegan, but I didn't have non-dairy milk or natural peanut butter, so I used what I have, and it turned out great.  

I hope my brothers and their ladies enjoy these cookies as much as I enjoyed my adventure in baking them.  (Again) Happy Nom Nom Monday, and Christmas Eve, chris!

Monday, December 17, 2012

All-American Monday Night Dinner


Happy Nom Nom Monday!  Today's dish is a classic American Monday Night Dinner.  Pan seared chicken breast, crispy baked potatoes, and cheesy zucchini.  This dish takes little to no time to prepare, yet it's still flavorful and filling.  

Ingredients: (for two people)
- 2 chicken breast (boneless skinless)
- 2 russet potatoes
- 1 medium zucchini
- 2 tablespoons of olive oil
- 2 tablespoons of shredded cheese
- 2 tablespoons of butter
- 1 tablespoon of sour cream
- salt and pepper

Directions:
Preheat the oven to 400ºF.  Scrub the potatoes, pat dry, and puncture a few times with a fork.  Brush about a tablespoon of olive oil onto the potatoes, and sprinkle salt over them.  Then place on the middle rack of the oven (if it's reached the desired temperature), and place a bit of tin foil on the rack below to catch any drippings.  They should take about 45 minutes to cook.  

While the potatoes are cooking, prepare the zucchini by rinsing them off, cut the ends off, and then slice in half length wise.  Rub butter on a baking dish large enough to accommodate the zucchini.  Then place the zucchinis in the dish, and sprinkle the cheese on top of them.  Any type of cheese will be yummy.  I used cheddar, and a packaged mix of 3 Italian cheeses.  Also add some small pats of butter on top of the cheeses, and then season with pepper.  They will take about 20 minutes to cook, so once there is about that much time remaining on the potatoes stick them in with them.    


After you've prepared the zucchini, season the chicken breast with salt and pepper on both sides.  Once their is only about 10 - 15 minutes left on the potatoes, heat a skillet large enough to fit both breast with the remaining bit of olive oil.  Then gentle place the breast in the pan after about a minute.  Flip only once, and each side should only take about five minutes, or longer depending on how thick the chicken is.  

Once everything is done, dish up and serve.  I added some sour cream, butter, and some salt and pepper to the baked potato.  


This dish was so savory and filling.  Adding cheese to the zucchini is a great solution for anyone who might be a bit hesitant to try this great winter veggie.  I can't believe how easy this was to prepare either.  I could make this every night!  Happy Nom Nom Monday, and happy DIYing, chris!

Monday, December 10, 2012

Stuffed Chicken in Bacon Coats


Happy Nom Nom Monday!  Today's recipe is a Stuffed Chicken in Bacon Coats.  I knew when I saw this recipe in Best-Ever 30-Minute Cookbook (by Jenni Fleetwood), I had to give it a try.  I was hesitant at first, because I thought stuffing a chicken would be beyond my talents in the kitchen.  I don't want to say it was easy, but it wasn't as hard as I was anticipating.  Well worth the payoff for this yummy meat meal.  

Ingredients:
-  2 Chicken Breast (boneless skinless)
-  2 tablespoons of cream cheese
-  1 teaspoon of fresh dill (or chives)
-  4 strips of bacon
- 1 teaspoon of extra virgin olive oil

Directions:
Preheat the oven to 400ºF.  In a small bowl throughly mix the dill and cream cheese together.  The cookbook called for chives instead of dill, but chives are hard to find right now, so I went for dill.  I want to start an indoor herb garden, and I'll grow some chives, so it will be easy to find next time.  

Next, slice pockets into the chicken breast.  I used a very sharp knife, and started by basically drawing a horizontal line across the fattest part of the chicken breast's side.  Then I would peel the meat back as I went, carefully cutting deeper into the breast.  Getting started was definitely the hardest part, but once I got going it wasn't so hard.  

Now split the cream cheese mixture in half, and stuff inside the chicken breast.  Fold the flap of meat of the cream cheese mixture, and press the edges shut with your finger.  

Then wrap the stuffed breast in two bacon strips each, and place in a oven-proof dish.  Before placing in the oven dribble the olive oil over the breasts.  If you have one you can use a basting brush.  We don't have one, so I had to skip that part.  

Finally place the dish in the oven for 25 - 30 minutes.  We have a tiny amount of chives in an outdoor box, so I grabbed a couple of them for garnish.  

This was really good.  I want to stuff all sorts of things into chicken breast now!  I love ham and cheese in a chicken, so that might be next on the list.  I hope you give this a try, I promise you'll enjoy it!  Happy Nom Nom Monday (again), and happy DIYing, chris!


Monday, December 3, 2012

Pork with a Brie & Blue Cheese Sauce


Happy Nom Nom Monday!  Today's recipe is a delicious Pork Tenderloin with a Brie & Blue Cheese Sauce, and a new potato & carrot side.

Ingredients:
For the Pork & Cheese Sauce:
-1 lbs of thinly sliced pork tenderloin
- 1 tablespoon of butter
- 3 tablespoons dry white wine
- 3/4 cup heavy whipping cream
- 1 tablespoon of chopped fresh parsley
- 4 oz of brie and blue cheese
- 1 1/2 teaspoons of honey mustard
- ground black pepper
For the Potatoes & Carrots:
- 1 tablespoon of olive oil
- 3 cloves of garlic
- 3 carrots
- 2 cups of new potatoes
- 2 tablespoons of fresh parsley
- seasoned salt and ground black pepper

Directions:
Sprinkle ground black pepper on the pork tenderloins.  Melt the butter in a frying pan on medium-high heat.  Once the butter has melted, and started to brown place the meat in the pan.  Cook for about five minutes, or when the meat is just barely cooked, turning only once.  Transfer to a warm plate, and keep covered.  Then add the white wine to the frying pan, and bring to a boil.  Add the heavy whipping cream, and parsley, mixing together while bring back to a boil.  Then add the cheese and honey mustard.  Cook together until everything has melted together, also add any juices that have run off of the meat.  Once everything is throughly combined, plate the meat, and cover with the cheese sauce.  

To cook the potatoes and carrots, start by washing them off, and removing the skin from the carrots.  Cut the potatoes into quarters, and then slice the carrots about a quarter inch thick or less.  Also mince the garlic cloves, and warm the olive oil in a frying pan.    

Then add the minced garlic, and potatoes.

Add the carrots, and season with seasoned salt, and ground black pepper. 

Now chop up the fresh parsley, and add that to the mixture. Stir, cover, and let cook until the potatoes and carrots are cooked through, about 8 to 10 minutes.  

Serve and enjoy!  I love a good cheese sauce, and this one is fantastic.  My husband has become an expert at whipping this up, and it's now a new favorite of ours.  I could eat this everyday.  Though I guess that wouldn't be too healthy. 

Happy Nom Nom Monday, and happy DIYing, chris!

Monday, November 19, 2012

Chicken Tostadas


Remember the chicken I made last week for Chicken Nachos?  Well I had a bunch of shredded chicken left over so I made some Tostadas with them.  

Ingredients: (for two tostadas)
- A Shredded Poached Chicken (see last week's recipe for directions)
- 1/4 cup Cilantro
- 1/2 teaspoon Ground Cumin
- 2 Flour Tortillas
- 1 cup Shredded Cheese (mixture of cheddar and pepper jack)
- 1/2 cup diced tomatoes
- shredded iceberg lettuce
- 2 tablespoons salsa verde
- 2 tablespoons sour cream

Directions:
Preheat the oven to 450ºF.  Mix the shredded chicken, cilantro, and cumin together.  You can either do this before hand or while the oven is preheating.  I did it the night before.  Next, place the two flour tortillas on a cookie sheet.  Cover them with the shredded cheese, spread evenly over both tortillas.  Heat in the oven for 5 - 8 minutes.  

When the cheese is melty, and the tortilla is slightly browned it is ready to come out.  

Now place the shredded chicken over the melted cheese, and pop back into the oven for another 8 - 10 minutes.  

Once the chicken is done you can add some tomatoes, lettuce, salsa verde, and sour cream over the top.  I suggested the amounts, but it really depends on what your flavor palette prefers.  

This dish is great for a busy night, because it doesn't take much time to prepare.  Yet it still has a ton of flavor, and is filling as well.  Which can be a tall order for a quick meal.  This is definitely going to be a meal we'll try to always have the ingredients on hand for.  I think it would be yummy with different meats or refried beans too.

Happy Nom Nom Monday, and happy DIYing, chris!

Monday, November 12, 2012

Chicken Nachos


Last night Aaron and I made some yummy Chicken Nachos.  I love anything that involves melted cheese, so this is right up my alley.  

Ingredients:
For the Poached Chicken:
- 2 to 3 boneless skinless chicken breast
- 1 onion
- 2 to 3 carrots
- 2 to 3 celery stalks
- 3 garlic cloves
- 2 dried bay leaves
- 6 sprigs of fresh parsley
- 3 sprigs of fresh thyme
For the Nachos:
- 2/3 bag of Tortilla Chips
- 1/2 cup shredded cheddar cheese
- 1/2 cup shredded pepper jack cheese
- 1 can black beans
- 1 red pepper
- 1/4 teaspoon ground cumin
- 1/4 cup iceberg lettuce
- 1/4 cup plum tomatoes (about 1 1/2 tomatoes)
- 1/4 cup sour cream
- 1/2 c green salsa

Directions:
Preheat the oven to 350ºF.  Begin by removing the skin from the onion and carrots.  Then cut the onion into 8 wedges, and quarter the carrots and celery lengthwise.  Place all the veggies and the chicken breast in a large stock pot.  Add the garlic cloves, bay leaves, parsley, and thyme.  Cover everything with water, cook on high.  Bring to a boil, reduce to a simmer, and cover with a lid.  Let cook until the chicken is cooked all the way through, about 15 minutes.  

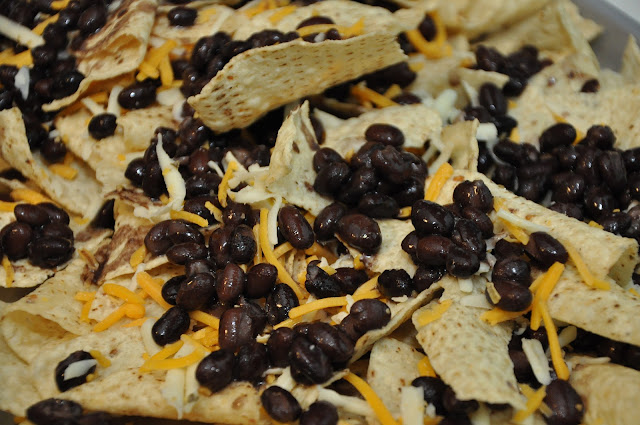
While that is happening get out a cookie sheet and cover with the tortilla chips.  Add half of the shredded cheese, and all the black beans.  


When the chicken is done, remove from the stock, and let cook on a plate.  You can freeze the stock for future use or discard.  Once the chicken has cooled shred, and add to the top of the chips.  Dice the red pepper, and add to the top.  Add the rest of the cheese, and sprinkle the cumin over the top.  Pop in the oven for 7 - 10 minutes, or until the cheese is melty.  

While cooking in the oven I shredded the lettuce, and diced the tomatoes.  When the dish is done baking in the oven remove, and added the lettuce, tomatoes, green salsa, and sour cream to the top.  

Aaron and I tore this dish up!  We ate the whole dang thing in one go!  So it's safe to say we totally enjoyed this meal.  We will definitely be making this again.  Maybe next time we'll try it with some beef instead of chicken.  I think banana peppers and jalapeños would be a great addition too.  This version is rather mild, or not so spicy at all, so if you like hot nachos jalapeños are a must.  Besides being tasty this dish has an added benefit, it would be super easy to prepare the chicken ahead of time.  Which would make prep time for this meal beyond short and simple.  You could even pepare more chicken then needed for this meal, and use the chicken in another dish.  Poached chicken has a ton of different uses.  The possibilities are as endless as your creativity.  

Happy Nom Nom Monday, and happy DIYing, chris!