Showing posts with label Valentine's Day. Show all posts

Sunday, January 20, 2013

Wax Paper Hearts


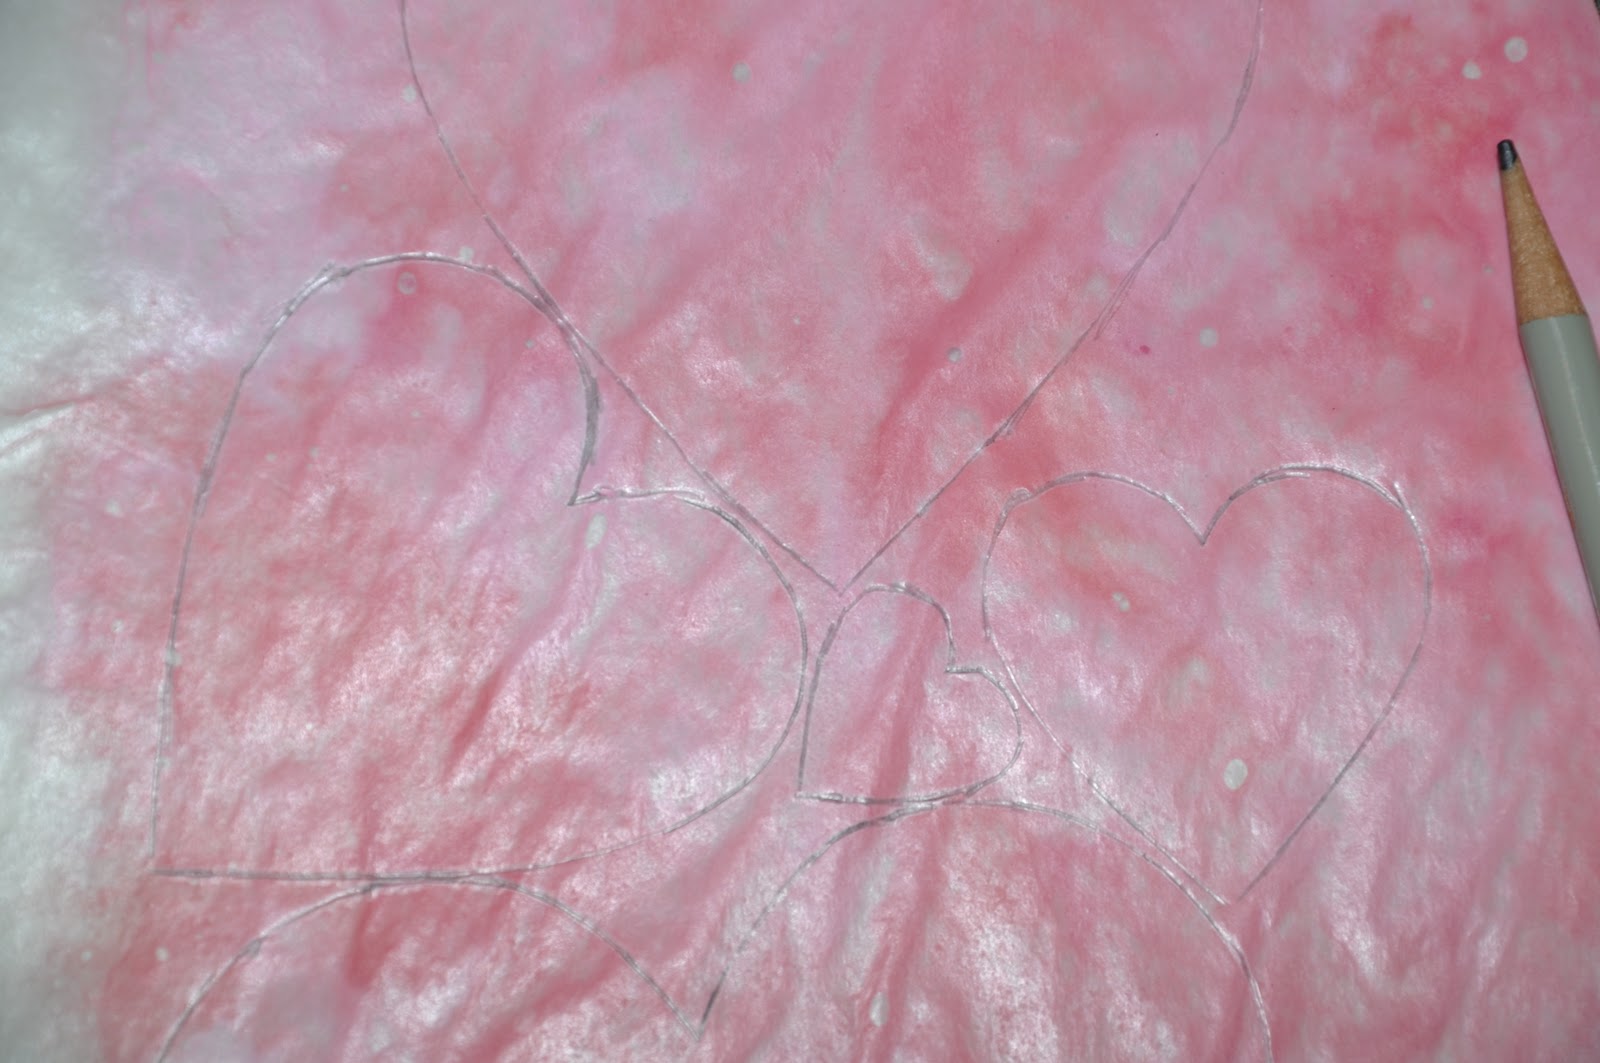
I'm not much of a Valentine's Day person.  I'm pretty sure it's a holiday Hallmark made up to keep the holiday season going. Though last year I made these Wax Paper Hearts with crayon shavings, and I can't get enough of how they look.  They are so pretty the way the sun shines through them, and they float around on the light breezes through the house.  I'm so happy to have a pretty bow window to hang them in this year.  


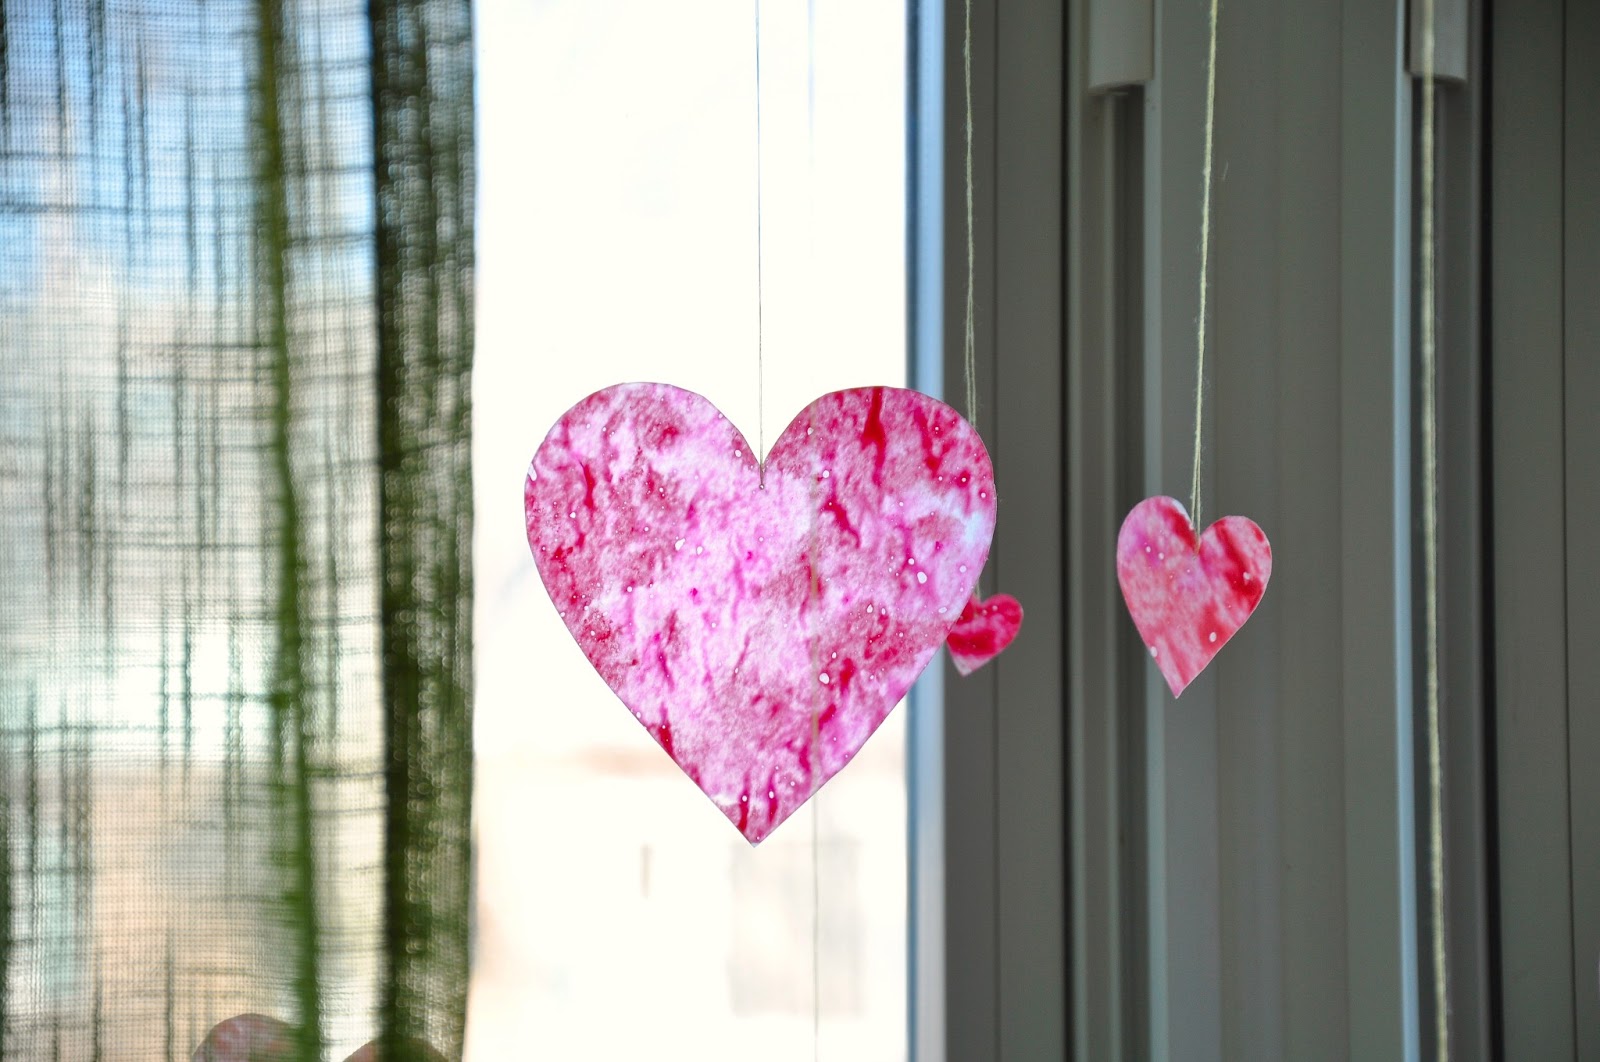
I hung them with thin yellow sewing thread, and taped them to the ceiling with painter's tape.  It's a simple but pretty way to decorate for the holiday.  I had a ton of fun making the hearts last year.  I liked the results of blending a couple different colors of waxes together.  I didn't make any new ones this year, but I'm dreaming up some excuses to use this technique again.  Hanging the hearts had me pinning for the excitement of melting crayon wax again.  

Hope ya'll had a great weekend, and happy DIYing, chris!

Wednesday, January 25, 2012

Wax Paper Hearts

Wax Paper Hearts
I got this idea from Martha Stewart.


WHAT YOU'LL NEED:
- Wax Paper
- Crayons (I used reds and pinks)
- Pencil sharpener 
- Craft Paper (or large paper bag)
- Iron
- Pencil                         
- Scissors
- Heart Stencils in varying sizes


Directions:
Begin by either cutting a piece of kraft paper or a paper bag in the size surface area you would like to work with.  Then pull out a long sheet of wax paper, and fold it in half over the kraft paper (so it fits on the surface).  

Unfold the wax paper, and sharpen a couple shades of red crayons evenly over the paper.  Try to stay away from the edges.  This is my first try, and I used too many crayon shavings. I used four whole crayons.  

Fold the wax paper over the shavings.  Either fold the edges over, or scoot the shavings and inch from the edge before folding over.  This way the hot wax doesn't leak out everywhere.  

Now lay a piece of kraft paper over the whole thing, and use an iron on medium heat over the whole surface.  When you begin moving the iron over the shavings it will be bumpy at first, and when you're done it will run smoothly over the paper.  When you check the paper, if it looks like any bits are still unmelted though, pass the iron over that area again.  

This is what one and a half crayons looks like, and this amount of shavings came out nicely.  

Close-up
This is how it will look after you are done ironing.  I used an old paper bag, and the seams did leave a bit of a crease in the wax paper, so if that would bother you definitely use fresh kraft paper.  

After, you've made about 4 or 5 sheets of melted crayon wax paper you are ready for the next part.   You will need the pencil, heart template, and a pair of scissors.  I found a great free printable heart template here.  They print out at the perfect size.

Using the heart stencils trace several hearts on each sheet with a pencil.   Trace more large hearts than small hearts.  

Then cut out the heart shapes.  Be careful with the wax paper, because the melted wax can easily be creased.  

The last step is rather time consuming, but it looks really good when it's done.  Find a window or a large light fixture to hang your hearts near.  I was able to string some yarn from the two hooks holding up my light on one side, and on the other from the light hook and a curtain rod.  Use a small needle and sewing thread, and make a hole near the top center point, pull the thread through the hole.  Tie a knot at the end, and hang it from the yarn or curtain rod (or however you desire to hang these little guys).  Hang the hearts a different lengths, and mix the colors and sizes around.  

Start now, you'll want to enjoy these for more than just a week or two!   Happy DIYing!  

Monday, January 23, 2012

Heart Crayons

This is a super easy, awesome Valentine's Day project.  When I was a kid I loved Valentine's Day, because all the crafts associated with this holiday are simply fantastic.  Today, I created Heart Crayons melted from crayon bits (via Martha Stewart).  We made these when I was I child, and the bucket of crayons had tons of broken chunks at the bottom.  Sadly I didn't have a plethora of broken up old crayons to use, but I do have an abundance of crayons.  As a 27 year old, I find I don't use up my crayons half as fast, as I did when I was five.  This project was so much fun though, I might be going to the dollar store to buy a bunch of cheap crayons!

WHAT YOU'LL NEED:
- 36 Whole Crayons (6 per Heart)
- Mini Heat Cake Tray (or any shape)

Directions:
Begin by removing all the paper from the crayons.  I found that when I removed a bit from the bottom first, the rest would slip over the tip.  Now preheat the oven to 350 degrees Fahrenheit.  

Next, break up the crayons with your hands into small pieces. If you want smaller chunks, than you are able to do by hand, you can use a knife and cutting board.  Use six crayons per heart.  Play with the colors you combine!  


Stick the heart pan in the oven for fifteen minutes.  Remove when the crayons look fully melted.  Be careful when removing it from the oven.  You don't want to splash the hot crayon wax about.  If you do dribble, clean up while the wax is still a liquid.  

Let the crayons cool for 15 minutes, and then stick in the freezer for 20 more minutes.  The heart crayons should pop right  out when they are ready.   

I love the way they turned out!  If you have a little one, these would make great Valentine's for school!

Until tomorrow, Happy DIYing!