Showing posts with label handmade card. Show all posts

Wednesday, December 26, 2012

Handmade Christmas Cards


Here is how I made my Christmas card this year.  I began by drawing a triangle on the back of a piece of scrapbooking paper. Then I measured how far apart I wanted the branches to be, and drew the outline of the tree.   

Next I cut out the tree with a sharp pair of scissors.  

Then I found a piece of handmade paper, and cut that down to card size.  I applied glue to my christmas tree, and then applied it to the front of my card.  To finish it off I wrote 'Merry Christmas' in green Sharpie.  

I enjoy the way these turned out.  I like Christmas Tree art for the holidays.  Happy DIYing, chris!

Wednesday, September 12, 2012

Handmade Masculine Card


I finally made a card for my brother's package.  Now all I need to do is add some stuffing, and get it over to DHL to be shipped.  For today's DIY I will share how I made the card. 

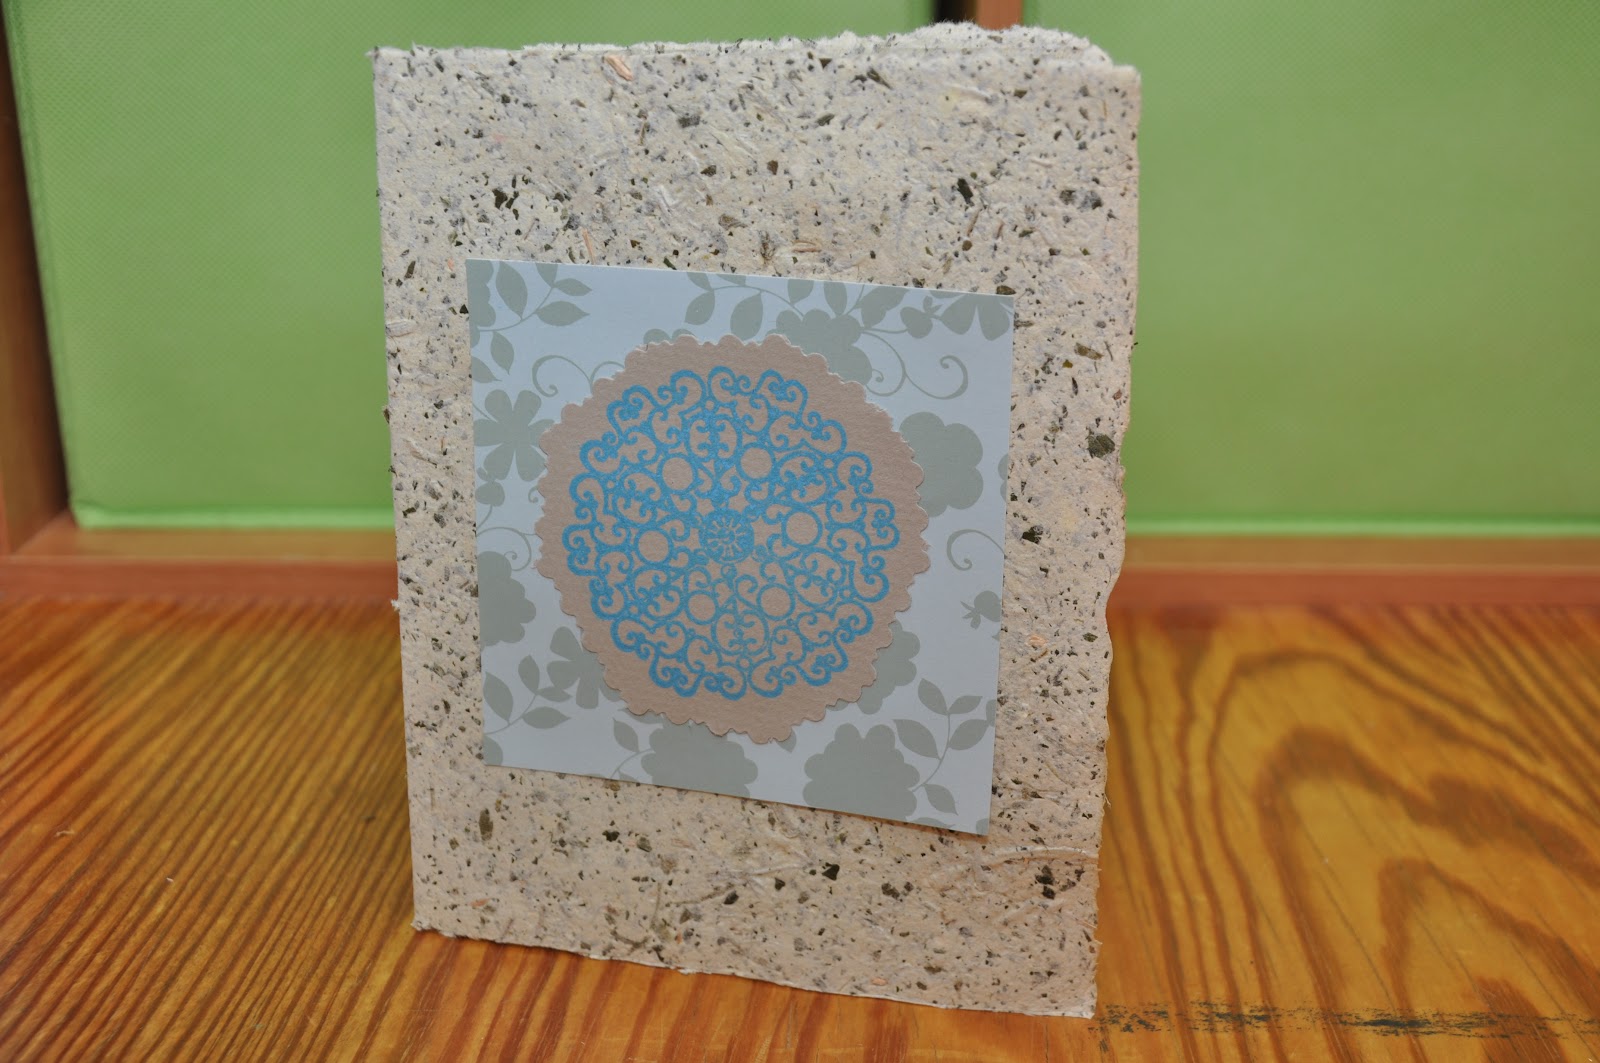
I started off by stamping this large decorative stamp onto a piece of grey pastel paper.  The first try I didn't press hard enough, or charge up the stamp with enough ink.  So on the second try I made sure to correct those two possible mistakes, and it came out perfectly even.  

Next, I used a pair of fun scissors to cut out a circle around the stamp.  I practiced on the bad stamp before attempting with the good one.  

Then I found a square of scrapbook paper, and cut a piece of handmade paper down to size.

I folded the large paper in half, and then glued the scrapbook paper square to the center of the front.

To finish it off I glued the stamped circle to the front of the scrapbook paper square.  I'm happy with the turn out of this card.  The colors work nicely together, and it's not too girlie either.  Girlie cards come naturally, but I have to spend a little more time thinking about how to make a masculine card.  

Have a lovely day, and happy DIY, chris!

Thursday, May 3, 2012

Handmade Card


Trying to stick to my goal this month on posting more DIYs, so here is the birthday card (with envelope!) I made for Aaron.  I've made a variation of this before.  I got the idea from The Ultimate Cardmaker, which is a fantastic book on card making.  If you have any interest in cardmaking this book is a must buy.  This book will generate enough inspiration for years and years of card making.  

The book suggest using teabag folding papers.  I had never heard of that type of paper the first time I made this card.  Of course I googled it, and so I decided to cut origami paper into 1.5 inch squares.  
Step 1:  Cut origami paper into 1.5 inch squares.  You'll need 7.  
Step 2:  Fold the squares in half both ways.
Step 3:  Fold the squares on their diagonal.  
Step 4:  Pinch the middle in, and flatten into a triangle.  
Step 5:  On one side fold the the triangle arms under, making a square in the middle.  On the other side fold the tips that are sticking out back.
Step 6:  Make seven of these little guys.  For some reason only six made it into this photo ... opps.  
Step 7:  Now start attaching the seven squares together.  Begin by folding half of the top square back, and apply a quick drying glue.  Weave the next piece in by placing the triangle flap over your glue splotch, and press the top flap over the piece you placed over the glue.  
Step 8:  Keep repeating this process.  I found it was best to layer moving in a counterclockwise motion.  
Step 9: This is what it should look like before you slip in the last piece.  
Step 10:  Place the last piece the same way you did the other pieces, and then glue the other side in, but layer on top of the first piece.  
Glue the paper medallion down on a long card.  I made my card by folding some handmade paper in half, and taking a couple inches off the bottom.  I glued some twine and yarn under the bottom to make it kind of look like an award.  In the book they use ribbons, and I did that the first time I tried this, and it looked awesome too.  
When all the ribbons or string/twine are in place hot glue a button to the center.  Now you're card is complete.  I stamped 'happy birthday' across the top, and wrote a little love note on the inside.  

Now for making an envelope.  Once you learn this technique you can make an envelope for any handmade card, no template necessary.  
Step 1: Get a piece of scrapbook paper, and trace the card in the center of the paper.
Step 2:  Measure the width of your card, divide that number in half and then add a half inch.  Measure that distance away from the long outside edge.  Draw a line, and then using our ruler angle in from the corners.  For the short ends, measure 2.5 inches up, and draw a line, and then angle in from the corners again.  
Step 3:  Cut the envelope out.  If you wanted to line the inside of the envelope now would be the time.  
Step 4:  Place the card face down over the center, and fold the bottom flap up.
Step 5:  Fold the sides in.
Step 6:  Run a line of glue down both edges of the bottom flap, and smooth the side flaps down.  Then add a line of glue to the right side flap edge, and smooth the left flap over it.  
Step 7:  Now glue the top flap down.  You could also use a sticker to close it, or if you are into wax seals that would be super awesome.  
Step 8:  Finish off by stamping 'happy birthday' on the front of the envelope.  Now you're done!  

Hope ya'll liked this DIY, and happy DIYing, chris.

Wednesday, March 7, 2012

Oh Happy Day

I'm tired, so I'm going to post about my blogger-love post from the past saturday, that I didn't get a chance to put up.  I borrowed Oh Happy Day's elephant Valentine's Day card and envelop idea.  I love cutout cards, and her elephant is just the cutest thing!  Plus I have some plain orange envelopes I'd like to jazz up.  

I began by trying to stamp an envelope that I already had.  This first attempt smudged.  I have this trouble with this particular ink pad a lot, I'm not sure why I keep trying to use it.  

To make my elephant template I cut a piece of notecard the same size the envelope.  Then I drew an elephant on it like Oh Happy Day's, and then cut it out.  I then picked out a piece of handmade paper to use for the actual card.  I traced my template and cut out the elephant.  I used an awl to make the eye hole, and a razor blade to cut out the ear.  I curled the ear around a pencil to give it some shape.    

Then I stamped 'happy birthday' on it.

This is how the envelope and elephant look together.


This is what I wrote on the back.  Thought it was cute for a belated birthday card.  Hope ya'll enjoyed, happy DIYing! chris.

EDIT: I was extra tired when I first wrote this.   I even spelled my name wrong!  I went back and fixed all my spelling errors, and added a little more detail.  

Tuesday, February 28, 2012

Owl Birthday Card!

Today is my stepdad's 65th birthday!  Which of course makes today's DIY a handmade birthday card.  I love owls! I often resort to making an owl birthday card for no particularly good reason, other than to make an owl.  

I started off making my card by drawing a template on plain paper, and cutting out the different pieces needed to make the owl.  I then cut out the pieces, picked out the paper I wanted to use, and then used the template to cut out all the pieces for the various sheets of paper.  Once I got all my pieces cut out I picked a thick piece of handmade paper.  Using a ruler and a bone folder I made a crease along the middle, and then folded the paper in half.  Then I started gluing my owl down.  Starting with the body, then the eyes and the bottom belly piece.

Then I glued down the two middle eye pieces, the nose, the forehead/ear piece, and the two feet.

Next I glued down two more pieces for the belly, and now you have an awesome owl card!

I wrote 'Happy Birthday' out by hand on the front.  I like the uneven spacing and the way the lettering turned out, but if you want something more precise you could use a stamp.

This is the inside of my card.  I made up the wording myself, and printed it off from my computer.  Then I cut it out, and glued it down.  Andy, my stepdad got a bit of a chuckle out of it, so I was pleased.  :)

Hope you all enjoyed your Monday, happy DIYing!  chris

Tuesday, February 14, 2012

Valentine's Day Card

This is my Valentine's Day card to my sweetie.  I started by using my x-acto knife to cut out a heart in wax paper.  I should have used freezer paper, but I read on the internet that I could use wax paper.  That's what I get trusting what I read on the internet! :)  Wax paper doesn't stick when you try to iron it down.  My solution was to get out some 3M Spray Mount, and to spray just a super light coat on the wax paper.  

Then I pressed it down on a piece of handmade paper.  I painted the heart in white, and peeled the stencil off.  Worked out great!

I also cut out a chevron design from a piece of wax paper, and used the same technique to apply it to the first heart.  Before I placed the wax paper down I waited for the white paint to dry, and I torn the paper down to size.  I used a ruler as a straight edge, and just peeled the paper off.  Than I mixed up some light blue paint, and filled in my chevron stripes!  

I peeled off the wax paper, threw it away, and wow is this heart cute!  

To finish it off I glued it on top of another piece of handmade paper.  The first sheet of paper is made from a pulp of garden weeds and junk mail, and the bottom sheet is from my crayon paper project.  

Here's the back side.  I like to write my messages out, but you could always use a stamp.  

Hope you enjoyed!  Happy DIYing!  chris

Thursday, December 15, 2011

A simple Christmas tree

Lately I've been rather lazy on the DIY front, especially in the card making department (usually that's my specialty).  Thus, this year my cards are rather simple.  Though I'm of the opinion that you can never go wrong with a handmade card.  How could anyone be disappointed in all the energy and love you've put into crafting such a personalized greeting?


What you'll need:
  •  Scrapbook paper (with a pattern, at least 5 in. X 10 in.)
  •  Scrap card stock (at least 5 inches square)
  •  Scissors 
  •  Pencil
  •  Gold or silver glitter glue (I used the band Stickles, works well and great applicator)
  • "Merry Christmas" Sticker
Directions:
Draw a Christmas tree on a scrap piece of card stock.  This will be your template, so it doesn't matter what the paper looks like, but it does help if it's on the thicker side (makes it easier to trace).  After you're happy with the way your tree looks, cut it out. Now it's time to pick out your scrapbook paper.  Keep in mind the pattern will be the front of the card, the inside should be a solid color.  You'll want to pick a pattern that will look good as a Christmas tree.  Stripes in holiday colors work well!  Fold your scrapbook paper in half, with pattern side in; plain side out.  
With the folded side on the left, place the tree on the paper.  Keep the bottom left side of the template touching the fold.  Trace the template tree onto your scrapbook paper with the pencil.  Now you can start cutting out the card.  You'll want to start with the right side.  This side is the open side, so you can cut through both sheets of paper.  Once you reach the top of the tree and start going down the left side, you'll cut through both layers of paper for the top half of the tree.  For the bottom three tree arms you'll want to keep the fold in tack.  You may need to extend the arms more, and make them a bit thicker on this side.  Having the arms thicker on this side is really important, if they aren't thick enough you're card will tear down the middle.  When you finish cutting the tree out, you can flip the fold so the pattern side is now on the outside.  

At this point you're just adding decorations to your tree card.  I happened to have some "Merry Christmas" stickers I got on sale last year, so I used those on the front middle of my card.  Then I 'put the trim' on with the gold glitter glue.  I made a dotted zig-zag line down the tree, moving from right to left starting at the top.   Be sure to let the glitter glue dry complete before you try to write anything on the inside.