Showing posts with label pink. Show all posts

Sunday, January 13, 2013

Pink and Teal Nails


Today I painted my nails.  Below are the polishes I used.  From left to right Ulta's Encore Pink, Funky Fingers' Wild Child, Urban Outfitter's Cupcake, and Orly's Won't Chip.  

I used two coats of Urban Outfitter's pink.  Then I used the green painter's tape to mask off my nails, and painted on two coats of the Funky Fingers in teal.  After I removed the tape I let the teal dry, and then used a paperclip to add the small polka dots in Ulta's light pink.  Once the dots dried I painted on a couple coats of Orly's Won't Chip.  


I really like the Cupcake pink and the Wild Child teal together.  Maybe a bit too Spring time themed for the dead of winter, but I guess I've been inspired by all these warm days we've been having.  I pretty much only own colors traditionally associated with Spring.  I can't get enough pastels, and bright pops of pink and green.  Well that's all for today, happy DIYing, chris!

Wednesday, November 7, 2012

Paper Chains


Today I used those paper strips I made yesterday to make a few paper chains.  This is hard work.  I know what I'll be doing with all my spare time from now until I use them on Saturday!  I hope I'm able to get them all done in time!  

I think I'll just use white on the tops so hopefully I wont have to buy more orange or pink paper.  I'm so excited to see how this turns out, and to photograph my adorable niece!  

Happy DIYing, chris!  

Saturday, June 23, 2012

This Is Me #3


#1. My favorite color as a child was blue.  I hated pink.  I rebelled against all things labeled 'girlie'.  
Sorry about the blue mark on my neck, some pen transfer on this old photo.  

#2.  My 20s has been all about reconnecting with my inner girl.  I love pink now.  I'm embracing lace, sparkles, accessories, animal prints, and frilly things.  I've been growing my hair out.  This is the longest it's ever been.

#3.  When I imagine what I currently look like, I always picture myself with blonder hair.  I was a true toe head growing up, but I slowly became whatever color I am now.  What is this chestnut brown?  No where near blonde.  

#4.  I used to build houses for Habitat for Humanity in Orange County, California.  I miss how rewarding that hard work was.  I am thankful for the people I got to work with, and it was a blessing meeting the families we were building the homes for.  They all had their own unique story.  

#5.  I love long rides in the car on beautiful sunny days.  Which is exactly what Aaron and I are doing right now!  We are heading to upstate New York to visit some friends.  We are going to a jack & jill bridal shower, and camping.  It's going to be a blast!  

Have a lovely Saturday everyone, and happy DIYing, chris!  

Wednesday, June 20, 2012

Wide Macramé Bracelet Part 2


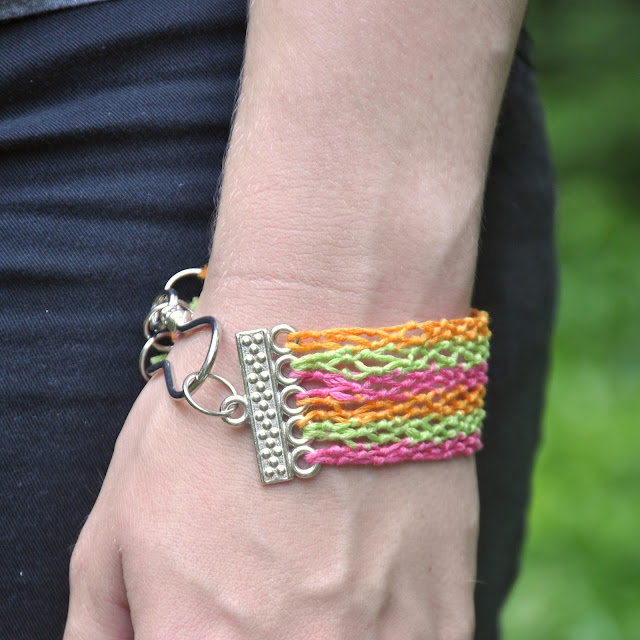
Oh man, hello Summer!  The high today for my area is 101ºF!!! Whew-wee, it's hot out there.  I didn't let the heat hold me back, I didn't delay!  I got the macramé bracelet I started yesterday finished.  To see the first half of this tutorial, check out yesterday's post.  Now on with how you'll finish off this bracelet.  


I periodically tested the bracelet around my wrist, and once I reached my desired length I began tying the last row onto the jump links.  The last row has to be a row that includes the first string in the first knot.  Other wise you'll have a lose end.  

I have twelve strands, so I tied four on each of my three jump rings.  

When I was done tying on all the embroidery threads I tested the bracelet out, and made sure I could easily attach the hook.  The first time I had to remove the jump rings, and add a couple rows.  I tested it again, and it was perfect, that's when I trimmed the long tails off.  My guess for 56 inches of thread to begin with was a bit off, at  least it didn't mess up the project.  I just need to figure out what to do with all these thread scraps.  :)  

I like the way this bracelet sits on my wrist, and the clasp is lovely.  

Of course I love the colors too.  :)

 I'm totally enjoying this technique.  I want to make a ton of these.  I'd like to try better thread, and find a bead that would work, and play with different clasps.  I guess there are only so many of these I need though, I wonder if my female family members would want one?  I wonder if strangers would be interested in buying them ...  I'd totally enjoy making a ton of these.  I love playing with all the colors, and there are so many different materials I could try out.  

Well I'm off to make up some more fun things.  Hope you're having a lovely day, and don't let the sun burn you out!  Happy DIYing, chris.  

Saturday, April 21, 2012

Wedding Anniversary Present


This is the outfit I got as a present for our one year wedding anniversary.  I wore it on Tuesday, it was super hot here in Delaware.  For this Saturday Blogger Love I wanted to try out Diversions' technique with cloning myself in an outfit pic.  I couldn't be more thrilled with the results.  It was way easy to do too!  I took my outfit pics with a tripod and self-timer as usual.  This time I tried to move around the frame and pose myself differently in each photo I planned on layering together.  In GIMP I layered all the photos together.  Erased the parts of the top layers that covered me up in the lower layers, and then there were four of me!  This photo definitely reflects my current mood.  I've been feeling cut adrift.  Caught in this strange dream space.  I want to do this cloning thing again!  Thanks Diversions!  

I bought this dress at a cute little local store at the Rehoboth Beach, called Super Kind. Which is where Aaron and I went for our anniversary.  I'll share some photos from our little beach adventure tomorrow. I love the colors and the pattern on the dress.  There is a silk slip attached as the bottom layer, and it makes me feel so girlie and pretty.   You can also see our two raised 4x4 garden beds.  The bed closest to the camera has four tomato plants, a Pink Ponderosa, Anise Noire, Cherokee Purple, and Riesentraube.   The back bed has a couple varieties of lettuce, some spinach, some chard, a Red Rock Mammoth Cabbage, and a broccoli plant.  

I love all the pretty flowers that are blooming right now.  It smells so good walking and driving around.  I love the smell of gardenias, and I can't wait until the honeysuckle starts!  

Love these colors together.  They matched perfectly with my dress, and I didn't even plan it!  

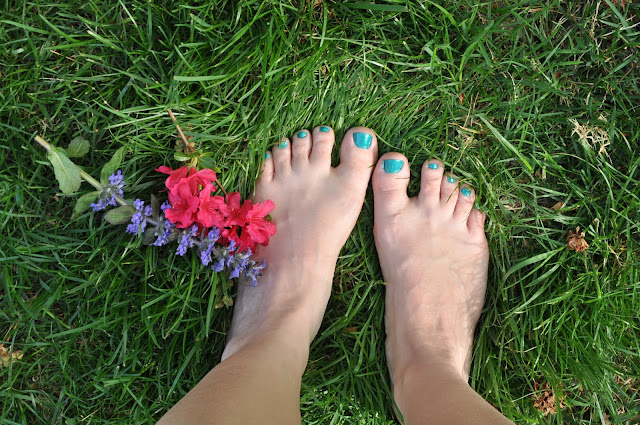
I usually hate photos of feet.  I'm not a foot person, but I had to show off how I painted my toe nails the color of the dots on my finger nails.  I love the feeling of grass or moss under my feet.  

One last photo of my nails, don't mind how awkwardly posed my hand is.  You can see my completed friendship bracelet in this photo.  I braided the end, and added some beads to finish it off.  Totally love it!  Hope ya'll are having a great weekend!  Happy DIYing, chris! 

Friday, March 23, 2012

Friendship Bracelet

Happy Friday!  For this Friday Flashback I wanted to make a friendship bracelet.  I used to make bracelets with embroidery floss and hemp all the time when I was a pre-teen.  When I bought my supplies for my owl elbow patches, I found a great deal on embroidery thread.  Which was a big reason I wanted to make a friendship bracelet, all those colors were calling my name.  I checked on the internet for a tutorial on how to make friendship bracelets, it's been ages!  After checking this out, I was good to go.  
Start by laying all your strings out in the order you want the colors to stack.  The strings on the left will stay on the left, and the strings on the right will stay on the right.  

It was a little rough in the beginning, but it's starting to look pretty cool.  Always start with the outside string, and move to the middle, and keep the colors divided in half the whole time.  Tie two knots on each string.  When tying knots on the left always have the tail going to the left, and do the opposite for the right side.  

In the middle tie one knot to the right, and then another knot to the left.  Now you can move back to the most outside string on the left, and start your next color.  

After I got going I realized I've used similar colors in tons of previous projects.  These were more or less the colors I used in my wedding.  As seen in the handmade paper spiral flowers I used as part of my center pieces.  

This how I painted my bedroom at my parent's house back in 2003.  I still love the way that room turned out, as you can tell by the above photo.  I'll be sad on the day I have to paint it back to white.  

Well, that's all I have for you today.  Have a great weekend, and happy DIYing!  I'll be back tomorrow with my Saturday Blogger Love post, chris.

Thursday, March 22, 2012

Owlbow Patches and an Outfit Post

This past fall I noticed elbow patches were coming back in style.  Urban Outfitters has a cute yellow sweater with yellow patches, and ModCloth has a casual grey cardigan with faux leather elbow patches.  Then around Valentine's Day I noticed these heart elbow patches going around the internet, and they got me thinking ...  I want some elbow patches! 

BUT I wanted something different from what I was seeing out there.  I had this little idea in my head so I googled it "owl elbow patches", and the first hit I got was The DIY Mommy's elbow patches for a little boy's cardigan.  Cute, but not exactly what I was looking for.  Then I dug a little deeper into the interwubs, and found Bugs and Fishes' stuffed Felt Owl.  Though I didn't want to make a stuffed owl, I loved the way she designed her owl.  She has a great printout template, but I made my own instead.  I changed the nose up a little, but otherwise I kept him the same.  

I love how they turned out!  You can definitely tell my embroidery skills improved with the second owlbow patch.  Ha!  To see my beginnings you can click here.  I had a little trouble getting the first one in the right spot.  Which I didn't realize until I was just about finished stitching him in place.  On the second one I had a little trouble with bunching, but this didn't require me to remove as many stitches.  Aren't they cute?


What I'm Wearing:
*necklace from American Eagle (one of my favorite lady pal's gave this to me!)
*top sweater (with elbow patches) from Boscov's (it's a local department store, I bought the sweater for work.  The flower is covering up my work's logo)
*bottom sweater and dress from H and M (and you can't see, but I have a tank top on from them as well)
*slip is vintage
*I have two pairs of stockings on, and I'm not sure where either of them are from.
*boots from Bed Bath and Beyond (crazy, huh?)
*white flower pin is from Claire's, it also doubles as a hair clip.  I love it when I own something that has dual purposes!   

Happy DIYing, chris!

Thursday, January 12, 2012

December

For the last month of the year, December, I decided to freehand a Christmas tree with glitter glue. Then I wrote out 'December' at the bottom.  Tomorrow I'll put the finishing touches on whole calendar.  


Hope you've enjoyed!  Happy DIYing!