Showing posts with label accessory. Show all posts

Sunday, January 6, 2013

DIY Plastic Earrings


I hardly feel like doing anything these days.  It's just so cold, and all I want to do is curl up in front of the TV.  Swaddle myself in a warm blanket, and munch on snacks all day.  So today's DIY is a throw-back from when I was in college.  I hardly wear earrings anymore, but when I did I enjoyed mis-matching my earrings.  I found a set of plastic beads from Michael's that had about 10 beads, but none of the beads were a pair.  Though they all still clearly went together, so I knew they would be perfect for a making some homemade earrings.

I used clear fishing line to attach the beads to a sterling silver earring hoop.  

That's it!  A cute outcome for very little work.  Hope ya'll enjoy, and happy DIYing, chris!

Saturday, September 1, 2012

August Wrap-Up


Another month gone by.  Summer is nearly done now, and fall is approaching.  A couple days ago I could sense autumn in the air.  It was dusk, and there were leaves blowing around on the street, and kids were playing on the corner.  There was an urgency to their play, knowing that soon enough it will be too cold and dark out after school to play outside.  Usually when I start getting the beginning-of-the-school-year-jitters there is a crispiness to the air around dusk, but not this year.  The days are still in the nineties, and we are luck to get a bit of relief in the high seventies in the evenings.  The humidity is high, and the mosquitoes are biting.  

Today I'm interrupting my weekly This Is Me with my August Wrap-Up.  I've managed to fit four more This Is Mes into this month, #9, #10, #11, and #12.  I think the twelfth one is my favorite from this month.  I pinned this drawing of mine from that posting, and whenever I see it I'm impressed.  I know that must sound tremendously cocky, but I'm rarely overly proud of anything I create.  So when I am please with something I've made I want to scream about it from the roof tops.  I'm super picky, and I always try to be my toughest critic.  

I've been busy with DIYs this month!  Which I'm super happy about.  I'm loving the Tri-colored Braided T-shirt Bracelet I made this month the most, but my Bleach Dip-Dyed Tank Top, and my wide upcycled Fabric Bracelet are tied for a close second.  I also made cute tiny Button Earrings, a Hair Bowtie made with ribbon, and I started getting ready for Halloween with some paper Black Rats.  

You can also check out one of my other bleach dip-dyed creation in this Outfit Post.  Which also happens to be be the only outfit post I made this month!  

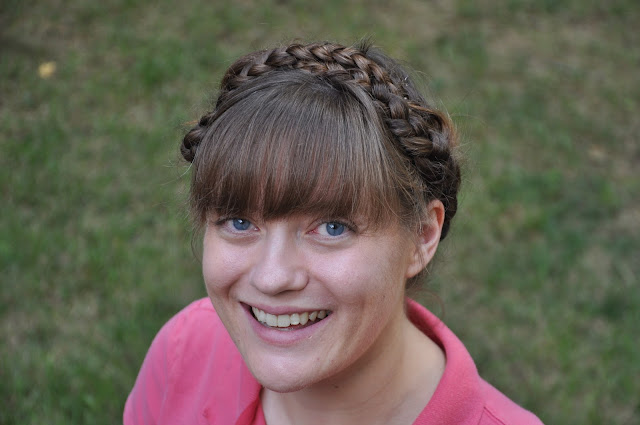
Though I did share two hair-do photos, my favorite being my summer look, the Braided Crown.  I also showed how keeping your hair in a messy bun during the day can result in lush Voluminous Locks for the evening.  

I also shared two cute nail-dos in August.  My Pink Polka Dot do wins hands down, but my Sun Kissed Nails are delightful too.  

Aaron and I traveled up to New York for our buddy Derick's (unisex) Bachelor Party.  We had an awesome time with live music, good food, great friends, and fun ShotSkis!

Speaking of drinking, I've whipped up five new drink recipes this month!  I've been drinking a nonalcoholic version of my End of Summer Cocktail since the first night I mixed that refreshing drink up.  I've made a couple different white rum cocktails this month, a Cherry Rum drink, and a Kiwi & Cherries Cocktail.  I also made two sweet chocolatey milkshakes, a Peanut Butter Nutella Snicker Smoothie, and a Buckeyes Coffee Milkshake.  

Mmm Peanut Butter ... I'm still day dreaming of the Peanut Butter Pie I made near the beginning of August.  Is it too soon to make again?  I've also whipped up a couple zucchini recipes, Sautéed Zucchini, and Parmesan Zucchini Chips with a Creamy Caesar Dressing.  Another snack recipe I came up with was a Cheesy Pretzel Apple Snack.  

In addition to all these lovely things I've posted, and working (nearly) full time, I've been working every chance I get on our house.  Things are finally coming together.  Most of the downstairs is painted, and we've refinished our hardwood floors.  They are looking beautiful all aglow.  I can't wait to move in already!

So that's what I spent my August working on!  I'm excited for this new season, and all the changes it will bring.  What is your proudest creation from August?  Are you ready for Autumn?  Happy DIYing, chris!  

Tuesday, August 28, 2012

Hair Bow-Tie DIY


I made a ribbon bow-tie a few months ago, but I never did anything with it.  I simply used a two inch wide wire lined ribbon, about four inches in length.  Sewed the ends together, then did the same with a quarter inch silk ribbon, about an inch in length.  I slipped the smaller ribbon over the larger ribbon, and wah-lah, a bow-tie!

When I got home from work today I decided to stick a hair clip through the back, and make it a hair bow-tie.  

It's a great size for my head, and considering how easy this was I could make a bow to match every outfit!  

Happy DIYing, chris!

Wednesday, August 22, 2012

Fabric Bracelet


Hey all!  Today I'm making a fabric bracelet.  I wear it as part of my work uniform, because I have to cover up my wrist tattoo.  I've made this bracelet before, but not for the blog, and my old one was stolen!  I used to get tons of compliments from the kids I photograph, when I wore this bracelet.  I knew with the beginning of this season I needed to make a new one.  I use an old polo shirt that was my mom's from when she was my age.  It's a great way to keep this old favorite around, even though it's gotten worn out, and doesn't look so great as a top.  

To begin I used a section that had a hem on two sides, and cut out a piece about 7 inches by 4.5 inches.  I folded the long side in, and pinned down to hem that edge.  

Then I folded the piece in half with the stitch side of the hems up. I sewed the ends together.  I consistently stitched the needle through the same side of the fabric, and made a tight loop over the ends.  This binds off the end, and makes for a neater and softer finish.  

Here is the finished result.  I love the soft old fabric.  This took me about two hours to sew by hand, while talking, watching TV, and snacking.  A great couch activity.  

I hope this bracelet gets as many compliments as it's predecessor.  Have a lovely day, and happy DIYing, chris!  

Wednesday, August 15, 2012

Tri-colored Braided T-shirt Bracelet


Another DIY I left until the end of the day, but I'm really happy with the results of this crafty project I threw together.  I made a tri-color braided bracelet.  

I used three different t-shirts in yellow, orange, and blue.  I love these colors together, they complement each other so well, and they're unisex!  I used scissors to cut three strips of each color.  The strips each measured a half inch wide, and eight to ten inches long.  I used the needle and thread to sew the strips together at the beginning and end.  

I also sewed all three colors together, and then I braided them together.  At the end I sewed the two ends together.  I left the different length ends, because they add a fun flare.  Like a mini pom-pom.  When sewing the ends make sure to go through all the strips of fabric, that way it's nice and secure and wont come unraveled.  

A simple craft, with great results.  Anyone could do this with some extra fabric, and twenty minutes to spare.  I'm fairly certain of seen similar bracelets at Forever21 sold for around five bucks.  This only cost me time. 

I'm thinking up an outfit to wear this with, and when I'll have my next chance to show off my latest creation!  I wear my DIYs proudly, and it makes my day when someone complements them.  I work with children, and it's the highest complement when one of them tells me my bracelet is cool.  

What's your latest creation?  Do you love to show it off?  Have a lovely day, and happy DIYing, chris!  

Tuesday, August 14, 2012

Button Earrings


O. M. G.  This morning I left for work at 8:30AM, and I only got home for the day at 9:45PM!  I left work at one, but I had to go to my house, and hang out while some contractors did some work.  Such a long day, and I only ate a small lunch this afternoon.  I didn't realize they would work for so long, and didn't plan to do my DIY until I got home.  Obviously when I got home I needed to eat, and by then it was ten thirty.  So needless to say today's DIY is beyond simple. 

I used these super tiny buttons to make post earrings.  

I simply hot glued them to the head of an earring post.  You can buy earring posts for jewelry making at Michael's.  Or at least that's my go-to-craft-supply store.  I love mixing and matching the different colors. 

See how tiny they are, aren't they cute?  I actually made this pair a long time ago, and they've held up pretty well.  I want to make more, but I might use an epoxy instead of hot glue to attach them to the earring posts.  I think epoxy will hold up longer, and will be easier to get a nice clean finished look.  

Hope ya'll are having a great tuesday, and happy DIYing, chris.  

Wednesday, June 20, 2012

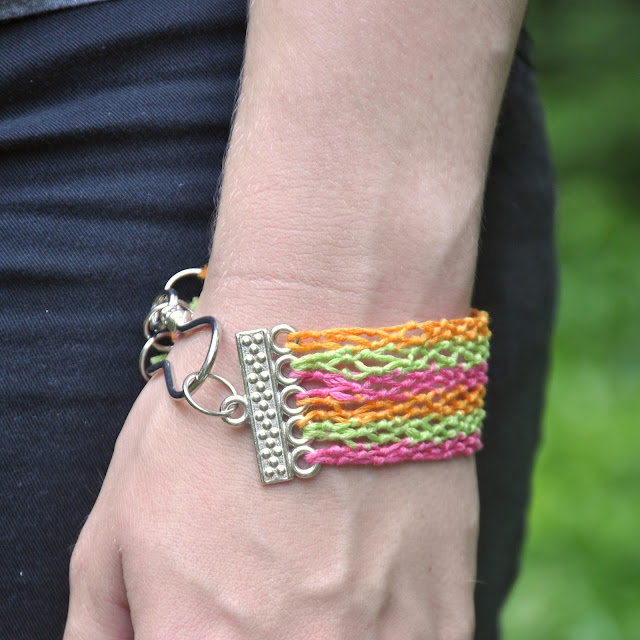
Wide Macramé Bracelet Part 2


Oh man, hello Summer!  The high today for my area is 101ºF!!! Whew-wee, it's hot out there.  I didn't let the heat hold me back, I didn't delay!  I got the macramé bracelet I started yesterday finished.  To see the first half of this tutorial, check out yesterday's post.  Now on with how you'll finish off this bracelet.  


I periodically tested the bracelet around my wrist, and once I reached my desired length I began tying the last row onto the jump links.  The last row has to be a row that includes the first string in the first knot.  Other wise you'll have a lose end.  

I have twelve strands, so I tied four on each of my three jump rings.  

When I was done tying on all the embroidery threads I tested the bracelet out, and made sure I could easily attach the hook.  The first time I had to remove the jump rings, and add a couple rows.  I tested it again, and it was perfect, that's when I trimmed the long tails off.  My guess for 56 inches of thread to begin with was a bit off, at  least it didn't mess up the project.  I just need to figure out what to do with all these thread scraps.  :)  

I like the way this bracelet sits on my wrist, and the clasp is lovely.  

Of course I love the colors too.  :)

 I'm totally enjoying this technique.  I want to make a ton of these.  I'd like to try better thread, and find a bead that would work, and play with different clasps.  I guess there are only so many of these I need though, I wonder if my female family members would want one?  I wonder if strangers would be interested in buying them ...  I'd totally enjoy making a ton of these.  I love playing with all the colors, and there are so many different materials I could try out.  

Well I'm off to make up some more fun things.  Hope you're having a lovely day, and don't let the sun burn you out!  Happy DIYing, chris.  

Tuesday, May 15, 2012

Rock Necklace


For April's Photo An Hour I  posted this photo, saying I was planning a DIY with these items.  I did the DIY with the doggie brooch at the beginning of this month, and today I am working with the rock.  This rock is from my one and only trip to Brighton Beach, England.  It was the only beach I've ever been to that was complete covered in rocks, no sand anywhere!  I love rocks, so I was in heaven.  Best beach ev-ar!  Way better than sand.  I didn't come home at the end of the day finding rocks in strange places, like I do with sand.  
Anyway on to the DIY.  In addition to the rock, I used some leftover chain from a project Aaron did, and some twine that came from a candle Aaron got from Pier1.  The rock is perfect for this project because it natural has a hole in it.  The moment I saw it I knew it was meant to be on a necklace.  This is my kind of DIY, because I didn't have to pay for any of the materials.  I also used a needle nose plier, and a pair of scissors.
This is the finished product on.  I started by centering the twine in the rock, and then I threaded it through the loops on the chain.  The ends of the chain met at the rock.  The ends of the twine met at the nape of my neck.  I used the needle nose pliers to remove the excess chain.  I eyeballed the length, placing it around my neck as I went to make sure I liked the look.  

I'm really pleased with the way this turned out.  So simple, and free, can't beat that!  I'm glad I'll be able to wear this lovely memory around my neck, and it looks so fancy.  It definitely doesn't look like something I made in less then ten minutes.  I hope I find some more awesome nature bits to make necklaces out of! 

Happy DIYing, chris!

Friday, April 6, 2012

Second Go At Friday Finds


Since it's a holiday weekend, I decided to take a break from my One Year Wedding Anniversary Series.  Well, I'm not Catholic, and I don't do much to celebrate Easter.  We go to my Grandparents' for a family meal on Sunday.  That's it, but I can't pass up an excuse to make a mess dying some hard boiled eggs, and then put on a cute dress and eat yummy sweet things.  I enjoyed posting my Friday Finds last week, and I love seeing what Elycia and Kaylah are finding each week.  Maybe this is an addition that will stick.  :)  Though, I hate to feel like a copy-cat!  I'll just have to get over that, cause I'm delighted with this new acquisition.  

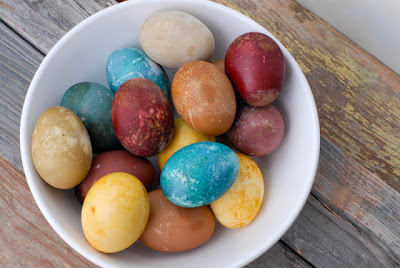
I found these lovely eggs on Boulder Locavore via craftgawker.  I love the idea of using natural kitchen ingredients to dye my easter eggs.  Thrifty and convenient, this is a DIY with my name written all over it! 

Dino Eggs!  I'm a huge fan of dinosaurs.  This egg dying tutorial is pretty similar to how you already dye your Easter eggs, with one simple extra step to get the dino effect.  You don't need any special materials or skills to get these awesome results!  Our Best Bites has a never ending supply of great ideas, they are definitely on my BlogLovin' list.  

Here is a tasty treat for the holiday from Lemon Basil.  Is it just me, or do you associate carrot cake with Easter too?  Aaron doesn't like carrot cake, so I probably wont be making these, as tasty as they look.  

I love this dress from Ruche!  If I was a church goer, I would love to be sporting this lovely number on Sunday.  I'm sure the compliments would keep rolling in.  :)

This hair piece would be the perfect accessory to go with the Come Sail Away Print dress above.  Plus I already own these!  I treated myself to them for our wedding.  I know I could make these, but I like supporting other talented independent crafters like Handle & Spout.  

Have a great weekend, and Happy Good Friday and DIYing, chris!  

Thursday, March 8, 2012

Owlbow Patches

I've had these Owlbow Patches on my mind since the beginning of February.  I finally got them started today!  
I began by drawing out the template for the owls on card stock.  I drew the body, and then cut it out and kept tracing the body to draw the other parts in.  Then I cut out each piece, so that I would be able to trace the same template twice.  

Now I used card stock templates to trace the parts out on felt in different colors.  I used eight different colors.  I laid them all out as I went, to make sure they looked good.  To keep everything in place I used embroidery thread, before I started sewing though I used a little glue to help keep things from falling off track.  I sewed the small black circles to the large grey eye circles with green thread first.  Next I sewed on the nose with white thread to match the nose felt, and the same for the bottom belly piece.  

For the belly I started at the bottom, and only sewed a straight line across the top.  Except for the top belly felt I tried something more playful.  

I liked the look of the lighter thread on the top stomach piece, so I followed that trend on the wings.  I only sewed the inside, because the outside with be sewn when I sew the patch to my sweater.  

Once I was ready to attach the patch I put on the sweater I was attaching it too and used four pins to secure the patch in place.  

This is how much I was able to get sewn today.  I still have a lot to go!  I hope I'm able to finish this project over the weekend.  I need to go to bed though, because I have an early day tomorrow.  Happy DIYing, chris.

EDIT:  Just wanted to check in to show how the elbow patches turned out.


Tuesday, March 6, 2012

Hanging your Jewelry

Today I'm organizing my jewelry, because this is what it looks like right now!  All my necklaces and headbands are bunched together in that lunchbox, and my earring and bracelets are in those stacked round containers.  
These are the three tools you'll need to get the job done, oh and you'll need a square of peg board.  My husband and I used an 1/16th bit to drill the thread holes for the hooks.  I bought the mug hooks at JoanAnn Fabrics for $3.50, and that was the only thing I needed to buy for this project!
I marked where I wanted my hooks to go, my husband drilled the holes out for me, and then I screwed in the hooks, and hung the jewelry.  I just filled in the pieces as we went.  I know there are a ton of different ideas for hanging your jewelry on the internet, but I thought this would give me the most freedom to fill in as I buy stuff, or give stuff away.  

Here is a close up of the peg board with my hanging earrings.  I love mismatching earrings, that troll earring and the parrot are two of my favorites (though I'd never wear them together).  This was the most difficult part, but it's still extra simple.  Start with either hook wherever you'd want the pegboard to hang.  Use the level to figure out where to hang the other hook.  

Here's a good view of the hook in the wall.  Don't worry I only hung my fake pearls on the wall. :)

I kept my headbands in the lunchbox.  I also have some pins, my backup hair things and chap stick in there.  Oh and those matches are from our honeymoon, we loved the restaurant they're from, Irene's.  My lunchbox has a lot of rust though, I need to do a DIY on this!!  Happy DIYing, chris.